Whoa. Finally, I got here. Sorry folks, I've been sick for like two weeks and so the planned final post of this set didn't happen. Let's get on with it..
This is the final part of the Serious Meal Two.
So our menu was: (Heston dishes are indicated by an asterisk (*))
- Chicken Consommé*
- Goat's Cheese Tarts
- Braised Chicken with Sherry and Cream*
- Glazed carrots* (as per previously)
- Steamed sugar snap peas
- Pommes boulangere*
- Tiramisu*
In this post, I'm covering the Tiramisu.
This is my first (by my thought) 'true' Heston-style dish - but which I mean my first food trompe l'oeil - Heston's Tiramisu. It looks like this..
Yep, it looks like a little plant - in this case small mint. The highly bemused look on the guests' faces was totally worth keeping them hidden until serving time.
Now this recipe is available online
here. There's a version in
Heston Blumenthal at Home also, but it doesn't have the "dirt" and the presentation. And let's face it, that's pretty cool presentation.
I've made tiramisu on a number of occasions and it really it worth the effort. If you've only had cafe-style or supermarket tiramisu, it is totally worth doing it yourself - the difference in quality really shines in a home made version.
Tiramisu
Now this dish is a lot of individual steps, and fairly time consuming. However, it can be made ahead of time, which I'd certainly recommend. Tiramisu benefits by a little flavour-building waiting time.
Let's look at the stages:
- Make crystalised dark chocolate
- Make caramelised white chocolate
- Assemble the 'dirt'
- Make thin chocolate disks
- Make the marsala cream
- Prep the sponge fingers
- Assemble layers
- Final presentation
So... a lot of little steps to do. It's not super-difficult thankfully. Let's get into it.
Prep the dishes.
Okay, this wasn't a step in the recipe but I was paranoid that my dishes (from a local hardware store) might be covered in chemicals or something. So I gave them a good wash.
Crystallised Dark Chocolate
Okay this is step one of the dirt making. The dirt actually has several different components. (It looks and tastes good, but frankly I think a little overkill).
Now, I know what you're thinking - "You know what chocolate needs? More sugar!"
Let's address this obvious deficit, shall we? So we have a small amount of water, a medium amount of chocolate and a large amount of caster sugar.
Time to make the sugar syrup.
Yup, all the water is pretty much gone, now we have molten sugar. Mmmm... sweet hot stuff.
In goes the chocolate to the sugar syrup...
And start whisking that sucker...
And whisking...
Yeah ok, we might be a while...
Now, I included all these pictures because it really does change enormously from this liquid chocolate stuff above into this crumbly dirt stuff. It was really strange to do, it felt almost wrong, because under normal circumstances "smooth liquid becomes crumbly and dirt-like" is a cooking failure, not a win.
Okay, so then your break it up, and it looks... well, exactly like rough dirt. It made quite a big pile. And tasted... well, surprisingly, it tastes actually really nice.
Caramelised white chocolate
So after that last step, this one is actually really easy. Well, it is once you get your head around the idea of what you do - which is bake white chocolate in the oven until it browns. This feels like another thing were my normal reaction was just "this feels so wrong...!"
So you take a little over a bar of white chocolate, and stick it on a baking tray and put it in the oven.
And then it looks... like this... (not very encouraging...)
But then it a little more baking and it looks like this.. (with a little crushing/mixing). Lighter coloured dirt. This tasted better than I felt it should... Who would have thought baked, browned white chocolate would be tasty?!?
Chocolate disks
Now the chocolate disks need to chill for a while, so I wanted to get those started before I continued with the dirt making. These are pretty straight foward, albeit a cool technique.
First, melt your chocolate.
While that's melting, take some sheets of acetate. (I'd recommend the thicker stuff. I think mine was 2mm, I wouldn't want it much thinner guage than that.) I got mine from an art supply store. Cut it to fit your freezer. (I was so glad I thought of this ahead of time, otherwise it would be a very messy mistake!)
Okay, the chocolate is ready.
Now for the fun bit...
Pour out the chocolate, then place on top a second piece of acetate and then put a heavy chopping board on top of all of it to flatten it out.
And place the whole stack in the freezer to cool. What you are doing here is making a (really) thin sheet of chocolate. If I were to do this again, I'd actaully squish out the chocolate a bit to flatten it before putting on the board. (In hindsight, you really want the sheet as thin as possible - mine was good, but thinner would have been better).
Okay, so while that was chilling in the freezer, doing it's thing, back to dirt making.
Finishing the dirt
Now the recipe calls for Grape Nuts, which you caramelise and such. I live in Australia, and I've never even
seen such a beast as a pack of Grape Nuts. So.. a bit of research later convinced me that there really wasn't anything close enough to do the job - similar flavoured things would just not be "pebble-like" enough for my purposes. So I decided to substitute crushed Heston chocolate biscuits (remember,
these ones) instead.
Looks like a winner to me!
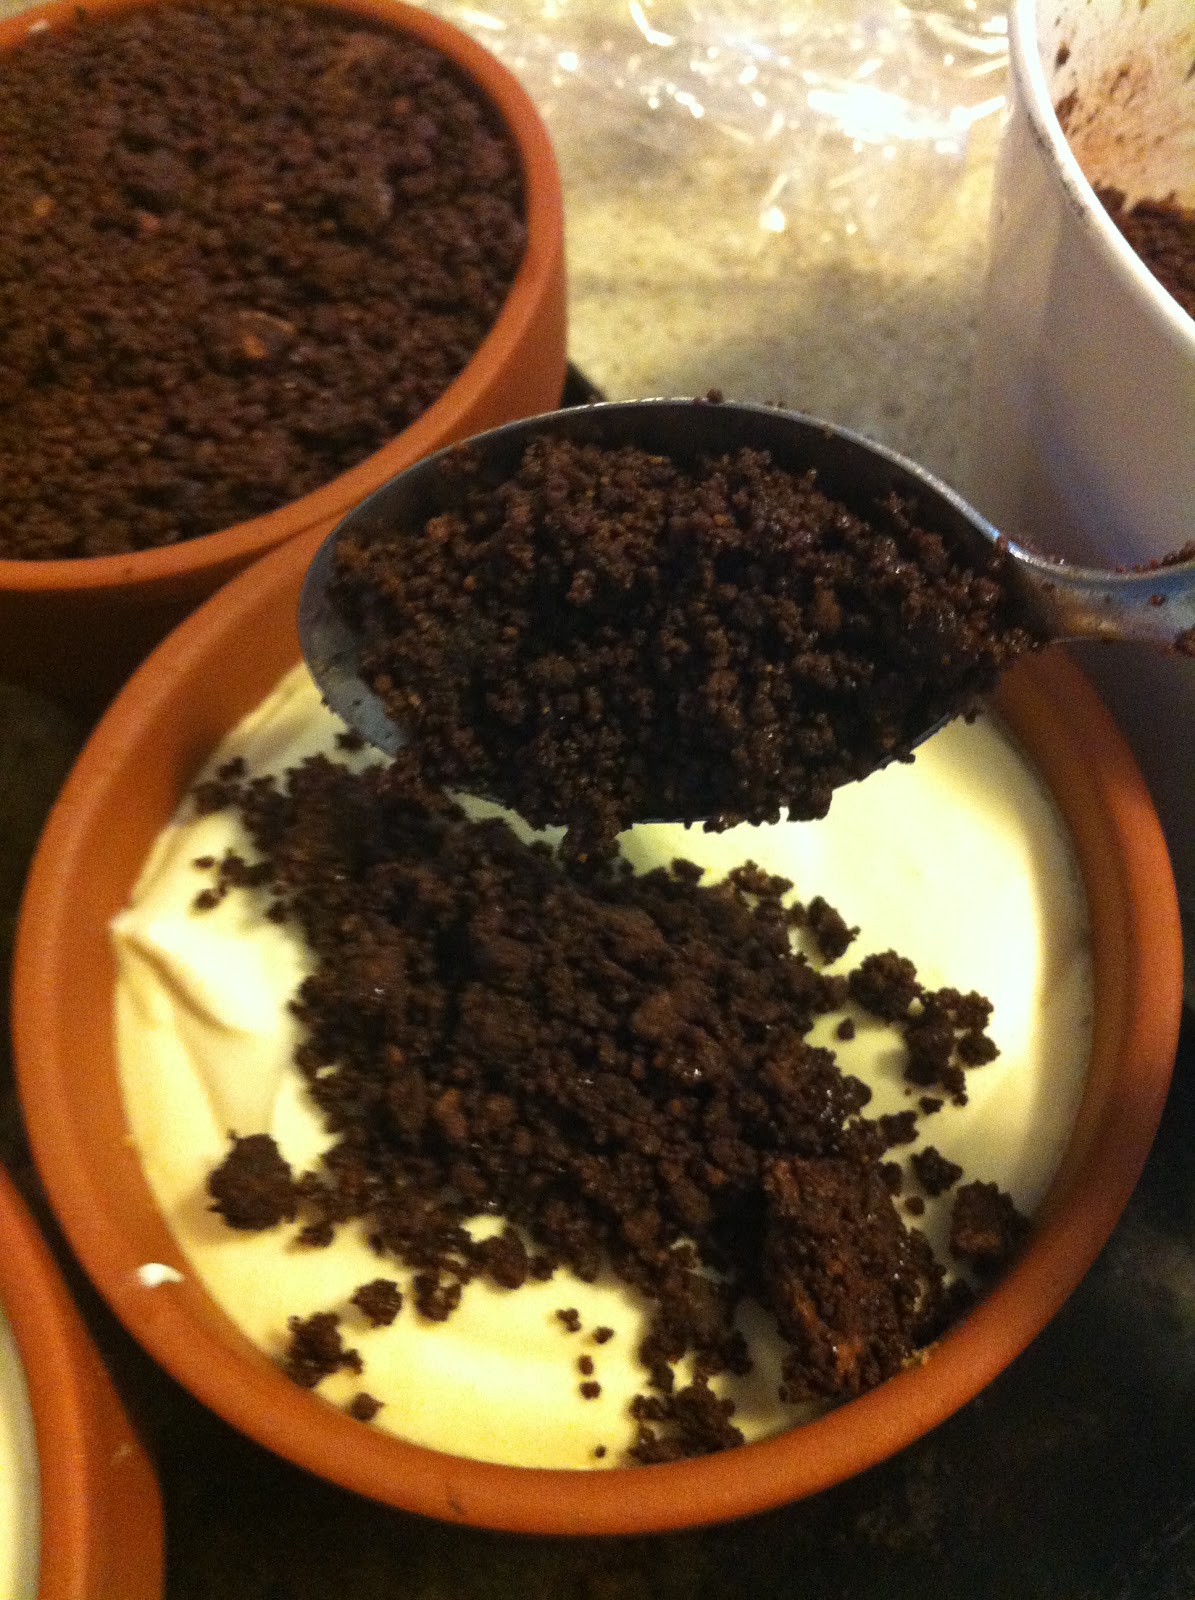
Okay, so then the two kinds of chocolate get mixed in with the crushed biscuits and dutch cocoa..
Plus salt and hazelnut oil.
Tastiest dirt ever.
Chocolate again..
Okay the chocolate is checked and is 80% set.
It looked pretty good - maybe 3mm thick, and fairly glossy, as no air gets to it while it is getting squished. I put it back in the freezer while I made the other ingredients.
Marsala cream
Marsala cream is possibly my favourite bit of the dish, it is so delicious!
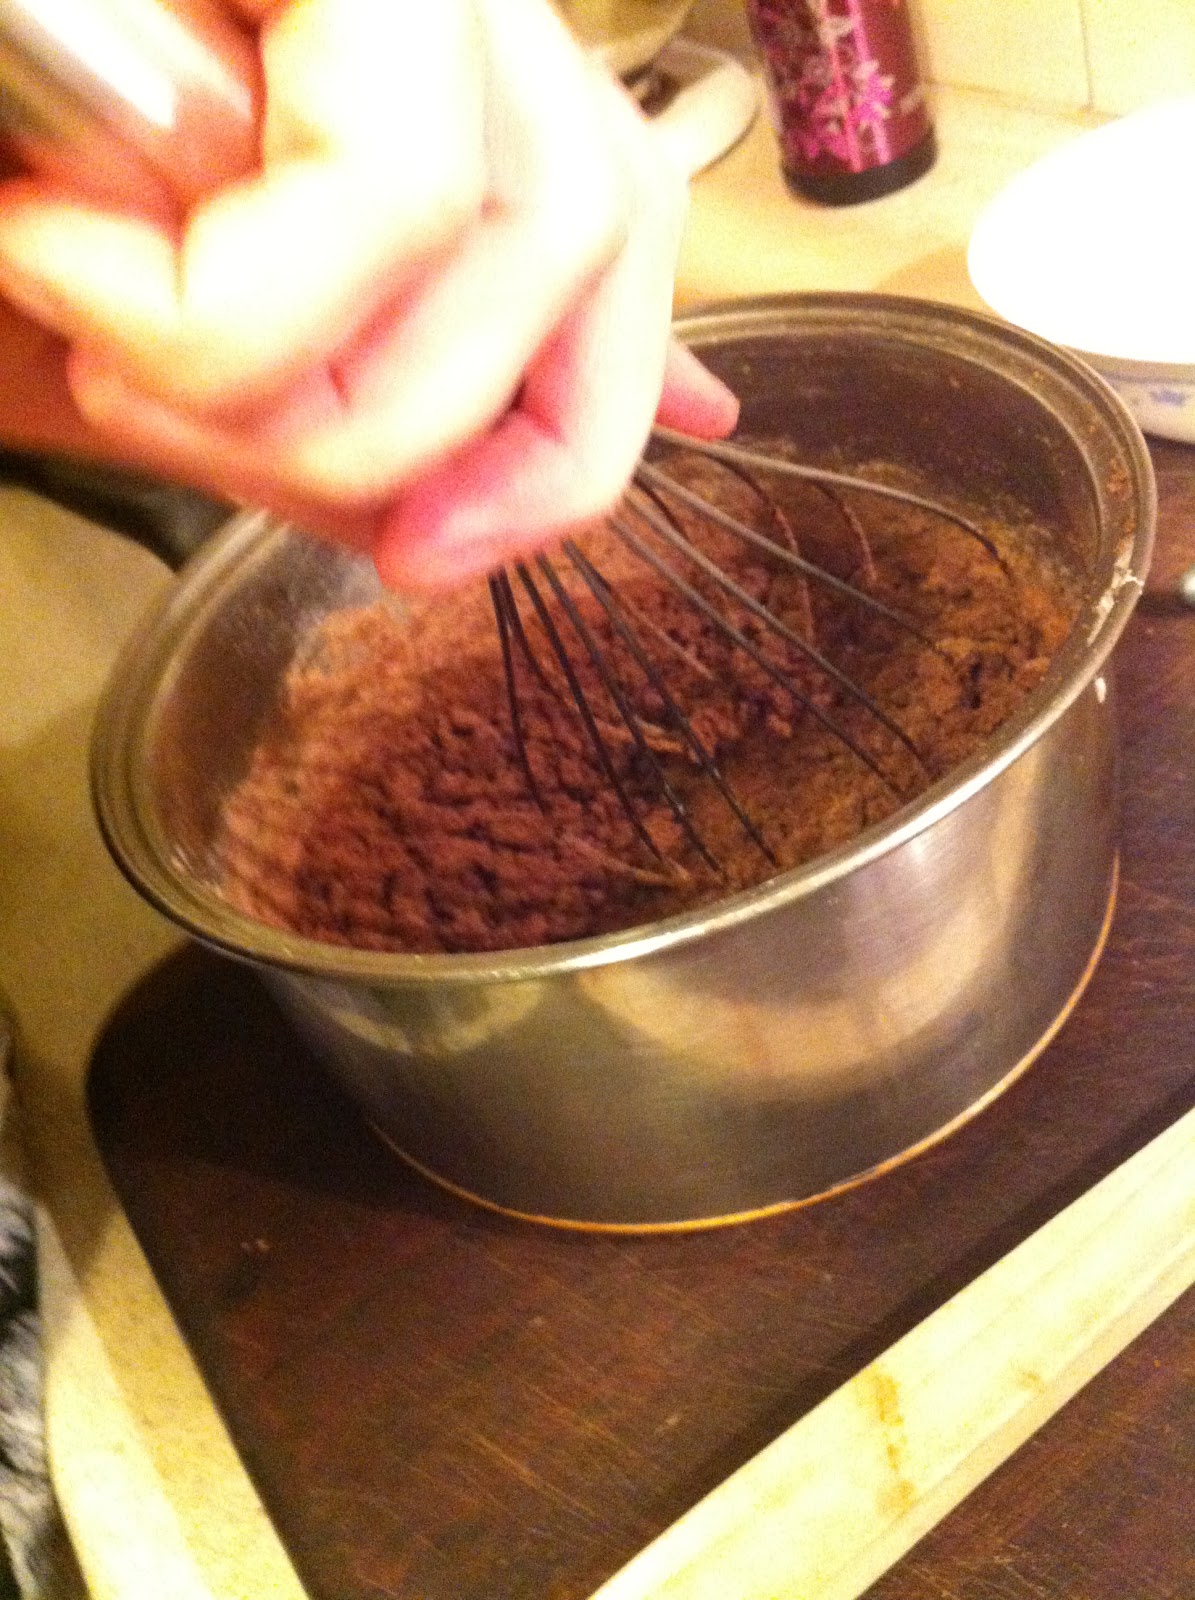
Eggs and sugar are whipped (for ages - unrefined caster sugar takes a lot longer to fluff up).
Nice fluffy stuff..
Then it is the marscapone, cream and Marsala's turn to get mixed up. I will admit I went for the pricey real deal (actual Italian) marscapone. I'm not sure how much difference it would have made in truth but it was lovely stuff..
The the fluffy sugar and egg mix gets folded in.
Then the pricey leaf gelatine gets added to a small amount of cream and heated until it melts, then folded back into the mix. (You can't see it melted in there what with it being transparent, you'll have to trust me).
That lot gets put aside while you...
Prep the sponge fingers.
So you make seriously good,
seriously strong coffee. (For the love of god, if making tiramisu you need high quality
real coffee. It's important, trust me.)
Coffee gets mixed with more Marsala.
And drizzled all over the sponge fingers. I bought mini sponge fingers, as I felt they would fit better in the pots. This was a good idea, and if you can get the smaller ones do so. (They are about 2/3 size the regular kind).
Smelled ... so.. goood...
Time to assemble
So time for the fun bit!
Chocolate disk is cut from the thin sheeting to cover the bottom of the pot.
Then sponge fingers.. and Marsala cream..
And then you do another layer of all three..
And finally, a layer of that impressive-looking dirt. Now, I did mine about 1cm thick layer, loosed placed, not packed. In hindsight, this was about twice as thick as I'd do next time - it is really too sweet otherwise.
Just before serving, place in your leaves. You can use basil or mint - I opted for large mint leaves.
You are supposed to paint the undersides of the leaves with chocolate (which I expect would stop them from wilting) but it was just too messy, and too obvious - it detracted from the effect. So I just placed them in when ready to serve. (Don't do it too early, mine were a little more wilted from an hour or so sitting in the fridge in their pots.)
Guest verdicts
They were delicious! But... huge. Way, way too big as written. My pots were about 10cm across, and about the size of a soufflé dish. Perfect, I thought. But really, much too much for a single serve. I would suggest using the tiny propagation ones, and using the written recipe as is for 6 people, not the 4 specified. I made the correct amounts for 6 (i.e. a one and a half mix) and the serves were really too large. And there was lots of dirt left over - so you could possibly even halve that.
Only one guest came even close to finishing his. Everyone else ate about half. They all enjoyed it a lot, but just couldn't finish them!
Things I learned:
- The thinner those chocolate disks are, the better. Even at 2-3mm, they were tough to break through.
- That dirt is delicious.. but mixed all together, really sweet. Don't overdo it.
- I don't know what Grape Nuts taste like, but the crushed biscuits were a good substitute.
- Good quality ingredients make this dish.
- Tiramisu is one of my all-time favourite desserts. It's just so tasty!
- Food trompe l'oeil is addictive. I want to make more food-masquerading dishes!
Next: I review my new favourite way to make hot chocolate!


